
Get ready to take your Figma forms to the next level of personalisation and user engagement. Because we're thrilled to introduce a new feature - answer piping!
Answer piping is a dynamic feature that allows you to seamlessly incorporate respondents' earlier answers into subsequent questions or instructions.
Very often this feature is used for customised greetings. Instead of a generic welcome message, you can greet respondents with a personalised message based on their previous responses. Imagine crafting a form that speaks directly to each user, making the experience feel tailored just for them. Such a simple but effective way to bring that personalised touch to your surveys! And so that you don't think that it's yet another marketing buzzword, personalisation has been proven to have a positive effect on response rates. In a large-sample study on the effect of personalising on response rates and data quality, researchers discovered that personalisation can boost web survey response rate by an impressive 8.6 percentage points.
So, of course we wanted to make sure our users can incorporate this cool feature into their forms in Figma, which makes our form building plugin even more advanced. If you want to see what other features Weavely offers for you to build amazing forms, check this page.
How does Answer Piping work in Figma?
After a respondent provides an initial answer, you can use that data to make the next question or instruction more relevant and personal. Whether it's addressing the respondent by name or tailoring follow-up questions based on their previous responses, the possibilities are limitless. Let's take a look at the example:
Step 1: Set Up the Base Question
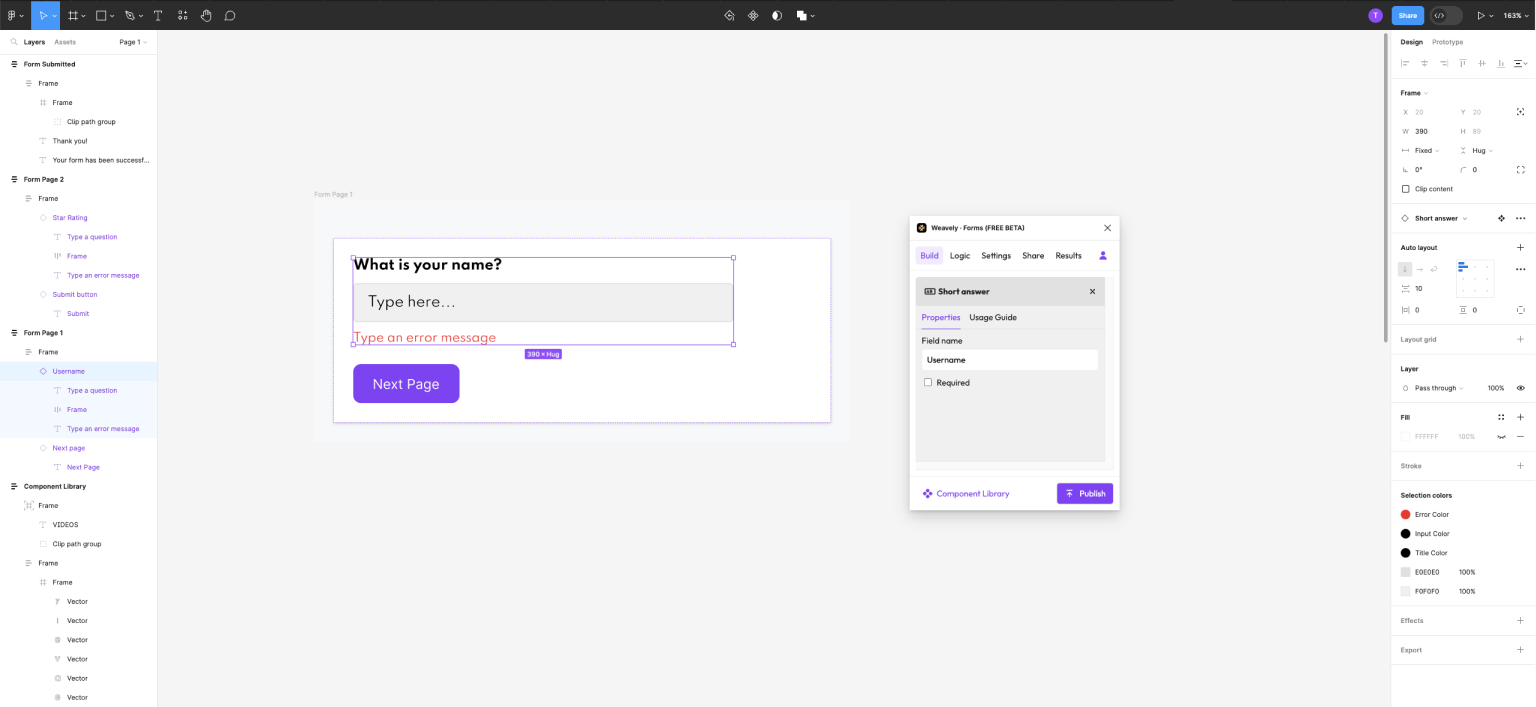
To begin, we define the initial question, prompting your respondents to provide essential information, such as their name in our example. The response to "What is your name?" is crucial as it sets the stage for the dynamic experience to follow. Important: For the set up to work correctly, you need to give a name to the field of your base question. In our example the name of our field is “Username”.
Step 2: Define The Piping
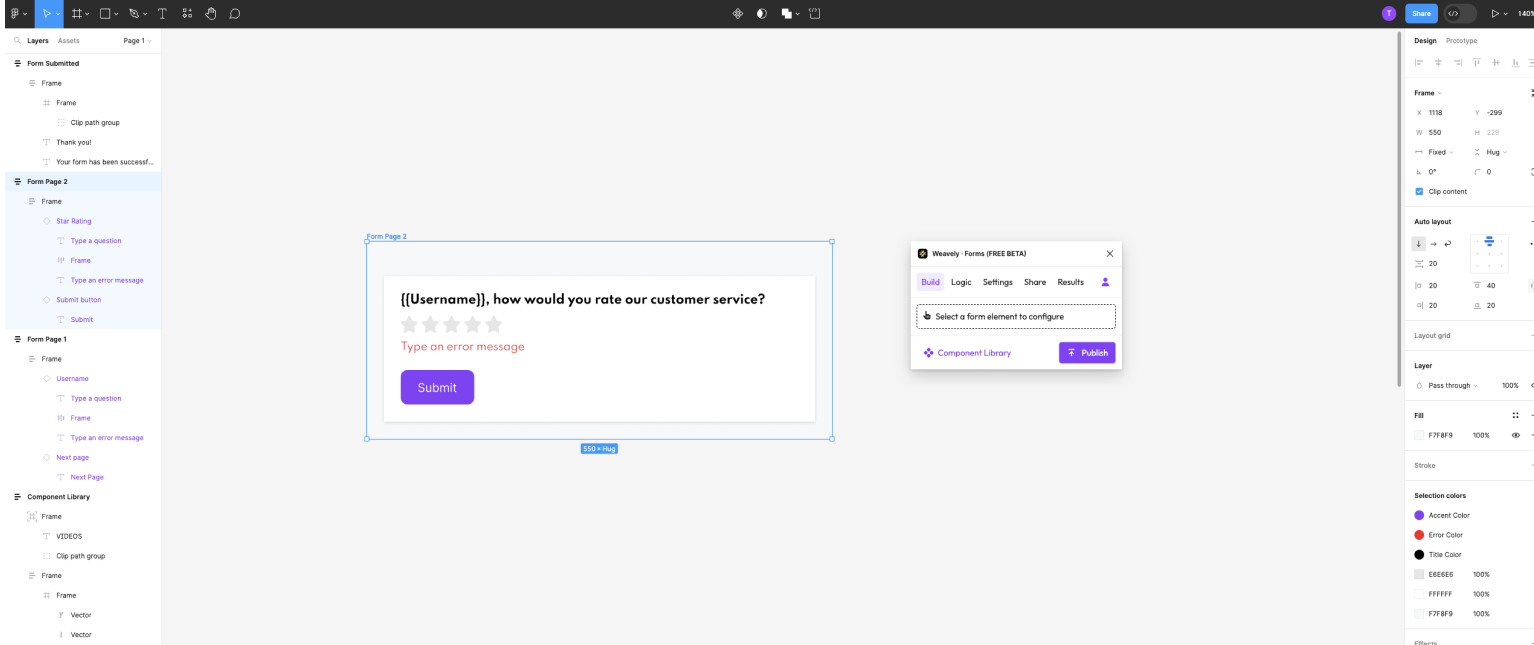
Now, let's proceed to the second question. Once you've collected the response for the base question, the respondent's name in our example, you need to link it to your subsequent question. Here's how it's done: in the question where you want to reference the respondent's answer, you'll use the placeholder that corresponds to the name you gave to your form field in Step 1.
Your question should be of the following format: "Hey, {{Username}}, please rate your experience." In this example, "{{Username}}" serves as a placeholder for the information collected in the initial question. And as you might have guessed, adding the brackets is essential. Brackets activate the "magic" and make the set up work.
Step 3: Publish Your Form
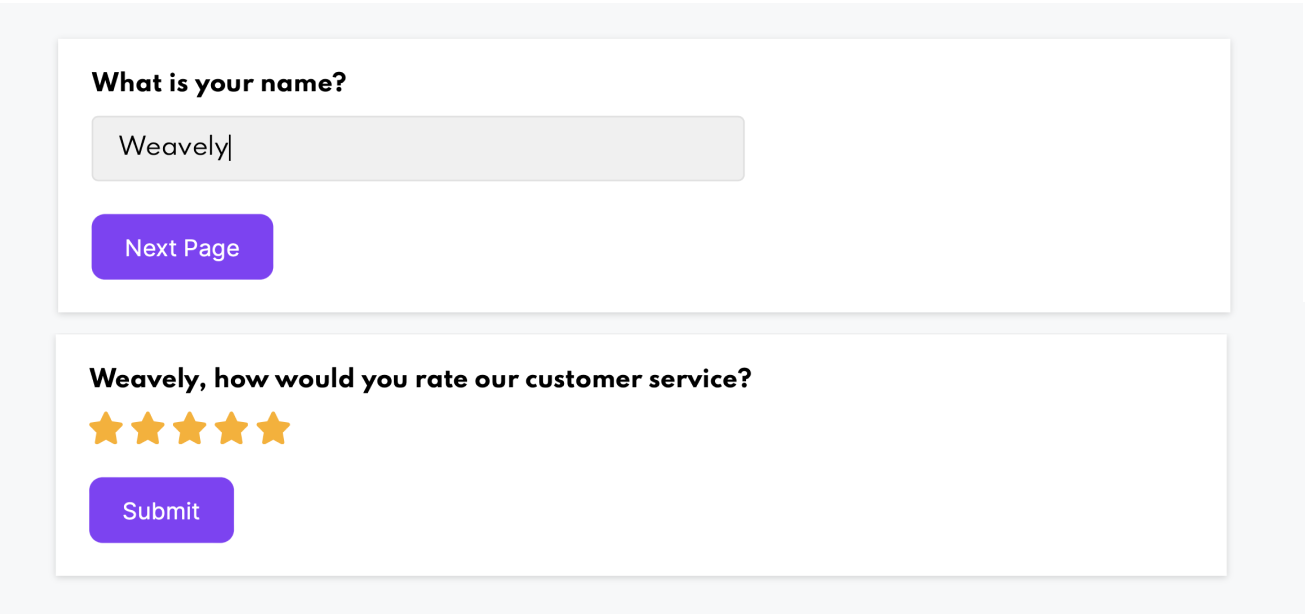
The last and the easiest step is to publish the form. When you launch your form, the placeholder "{{Username}}" in your question is automatically replaced with the name each respondent provides in the base question. It's as if your form is speaking directly to them.
Where else to apply Answer Piping?
Of course, personalised greetings is one of the most commonly used cases of answer piping. Yet, there are plenty of other applications for this feature. For instance, product recommendations could make a good case for using answer piping. Another great example is feedback forms. Although not yet widely used, answer piping could really help to get more specific and actionable feedback from respondents.
Let's look at some interesting applications of answer piping that we prepared in Figma with Weavely.
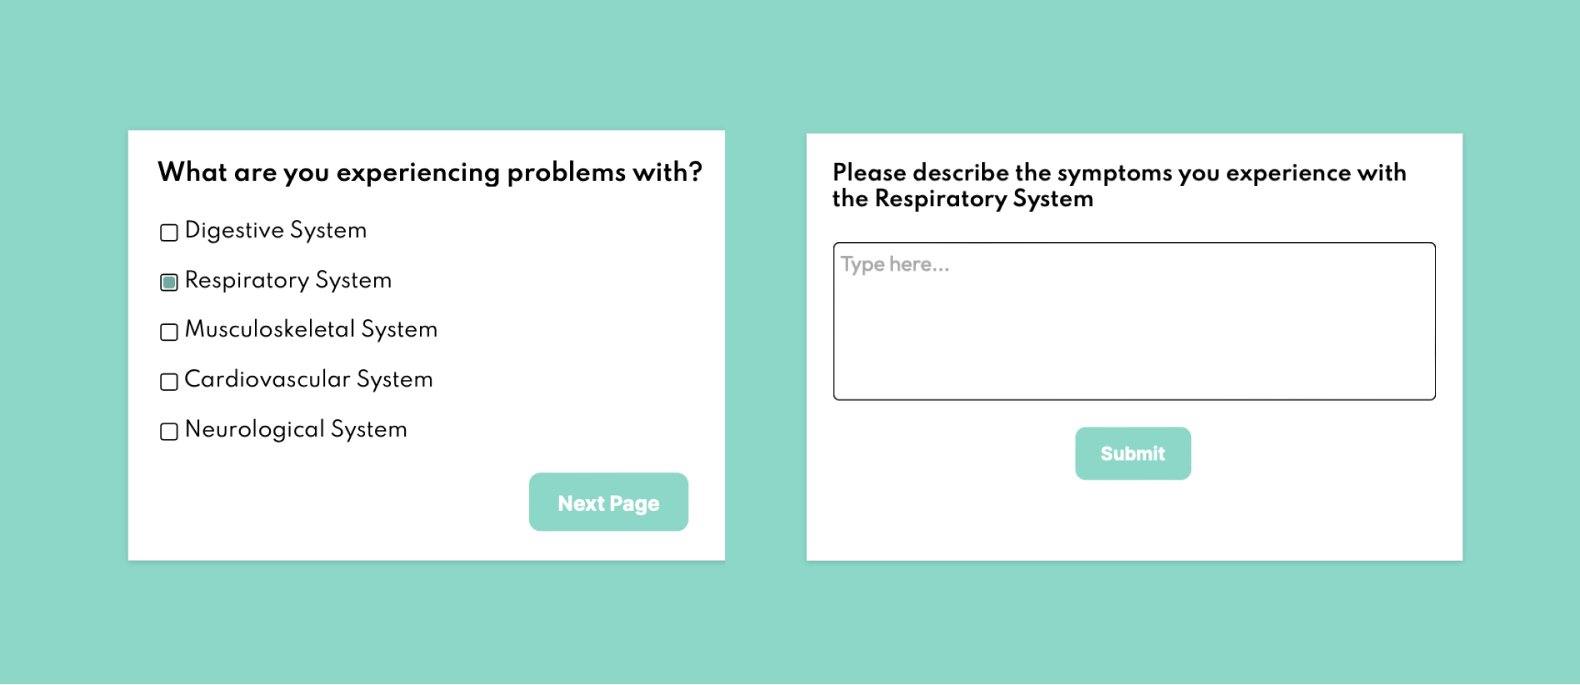
Healthcare assessment form
Event registration form

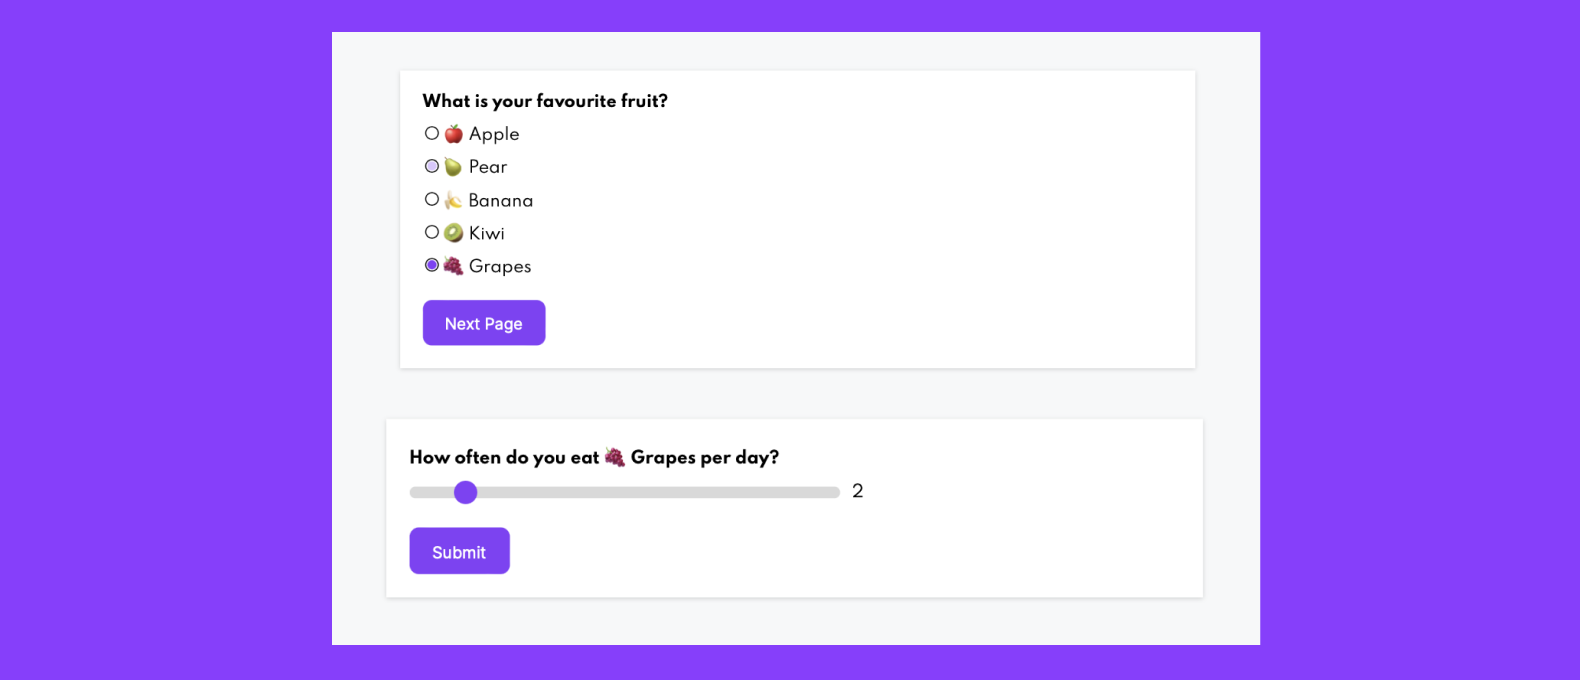
Food consumption survey
Video tutorial
If you prefer listening over reading and want to see a detailed tutorial on using answer piping in forms designed in Figma, you can watch our new tutorial:
On our YouTube channel you can find many other tutorials on various Weavely functionality, as well as video blogs about interesting cases in form design. See you there!


